
Updated October 2023
In case you are wondering what type of pins you should create in order to increase awareness, drive more traffic, convert more sales and grow your Pinterest account, we have the answer: Rich Pins, Rich Pins and more Rich Pins! Why are Rich Pins so relevant and useful? Why shouldn’t you hesitate to get them as soon as you can? Well, Today’s post is all about Rich Pins, and why we think you absolutely should include them in your Pinterest Marketing Strategy to make your presence and numbers go up. So if you haven’t set up Rich Pins just yet you’re about to know why you simply need to and how to! And, trust me you’ ll love them as much as we do
Now let’s just dive right into the good stuff, shall we?
What are exactly Pinterest Rich Pins?
Rich Pins are one type of Pins that show more information than regular Pins do. Pinterest sync information from your website to your Pin using metadata, so your pins will be automatically updated if something changes on your website. The goal of this syncing is to help Pinners to have a more enriching experience. By analyzing the metadata, Pinterest can categorize them correctly, and show them to the right audience.
There are three types of Rich Pins: Articles, Products, and Recipes. They all look a bit different and give a little more information about what the pin is about.
To be more specific, this is how Pinterest describes them:
“Rich Pins provide more context about an idea because they show extra information directly on a Pin“
You can easily tell a Pin is a Rich Pin when you see extra information about the Pin.
Let’s see the anatomy of each type of Rich Pin,
What do they look like and how do I recognize them?
Article Pins
It gives a snippet of the article; it shows relevant information about the article, such as the author’s name, headline, and description.
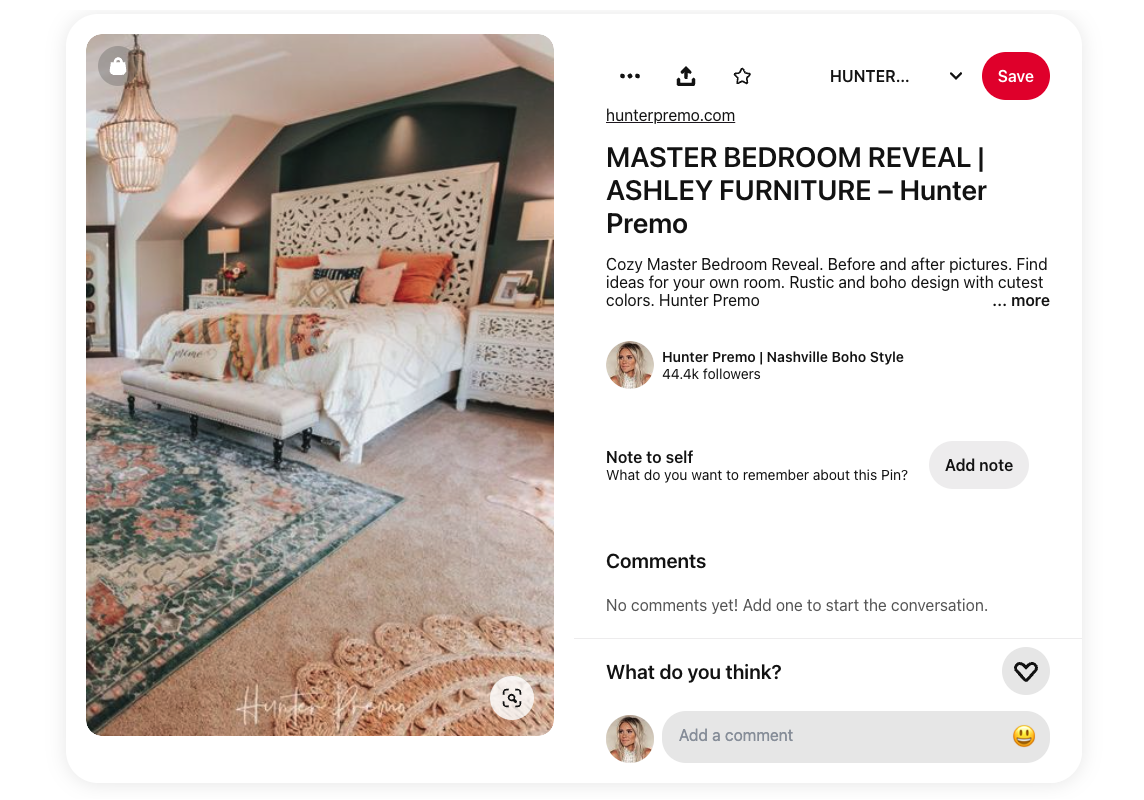
Link to the Pin.
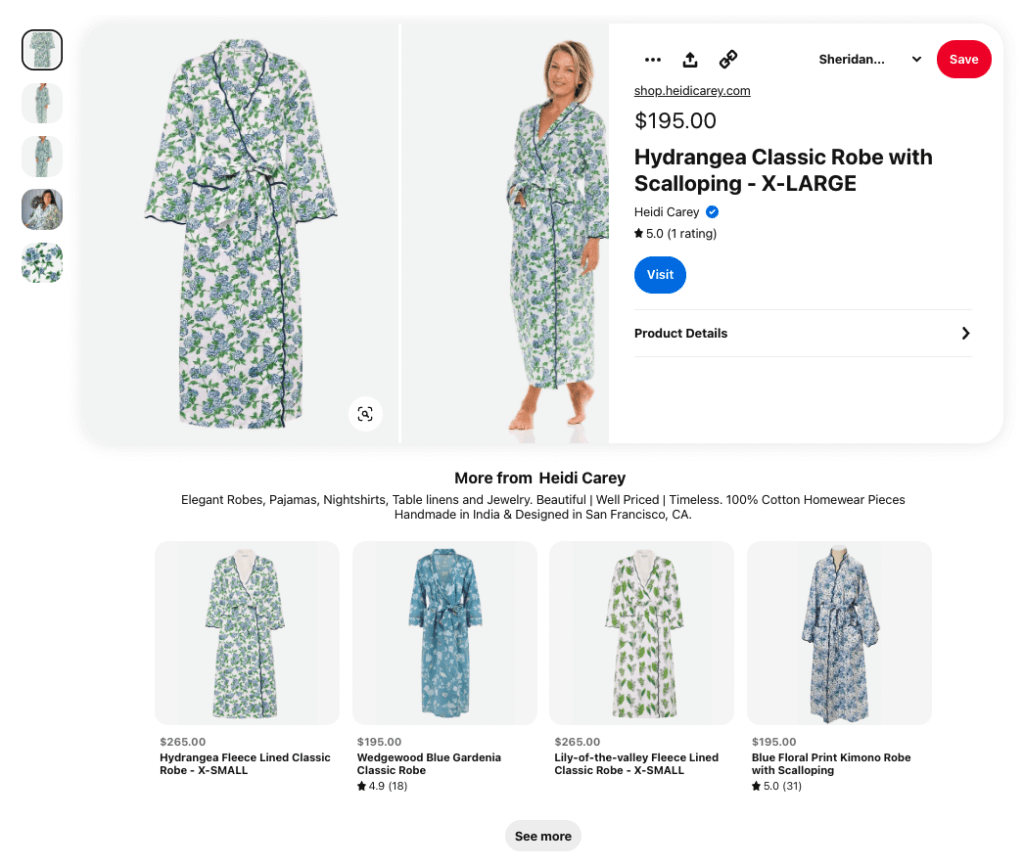
Product Pins
When you see a Product Pin, you know it is one because essentially you’ll see the price on it, but it also offers other information such as the availability and the link to the purchase site.
If you have the blue checkmark on your profile, so will do your product pins! This is because Pinterest has verified your shop as a merchant, and your pins will rank higher than those pins from merchants that are not verified. The Verified Merchant is a program that is free but has specific requirements that might be seen as challenging, but we promise that they are all achievable.
Don’t worry, understanding the Verified Merchant Program might seem like a tough duty, and hence, we plan to guide you through the key considerations for applying in an upcoming post!
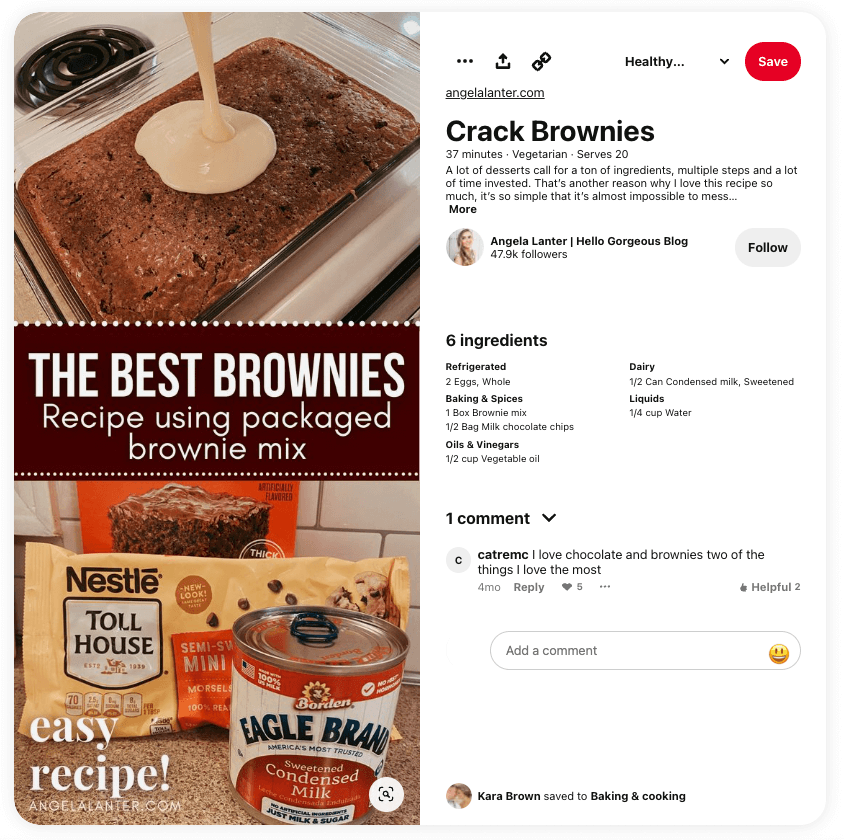
Recipe Pins
A Recipe Pin serves up more than just an irresistible title and description. It points to your appetite with a detailed list of ingredients required, the time you’ll need to prepare the dish, the number of servings it yields, and even the specific diet it adheres to. It’s a comprehensive guide that turns browsing into cooking!
Why do I need them?
Well, you are just starting on Pinterest, or you might already have your brand on this platform, so probably now your goals are driving more traffic and building a presence there, right? Well, in that case, don’t sleep on Rich Pins!, there’s no reason you shouldn’t use them. They give your Pinners a better experience. Because of all this extra information Rich Pins offer, they help your audience to make better decisions on interacting with your content. Whether Pinners may be looking for a healthy 15-minute spinach pasta recipe or style inspiration for their next purchase, it will always be a more enriching experience for them to find what they are looking for on a Rich Pin.
To make it even simpler, think about them as ad copy for your post: whenever you make changes on your website, all the information will automatically be reflected up to date on each one of your Pinterest Rich Pin and this is truly fantastic news if you have things such as products that change with time so this will save you a lot of precious time! As Rich Pins allow you to add extra information on your pins, you can add more keywords, which means greater reach afterward. It will help your brand stand out and build authority and trust in your community but also stay relevant to the latest trends on Pinterest.
How can I get Rich Pins?
So, first of all, Rich Pins are perks that only Business Pinterest Accounts have so if you want to have access to them and you haven’t done that already make sure to apply for that and set up one or even switch up to a Business Pinterest Account following this instructive if you already have a personal Pinterest account.
If you want to learn more about Pinterest for Business go check → Pinterest for Business 101 – Why Pinterest is the key to grow your business and how to get started from scratch
Now, to get Rich Pins is as simple as an A B C step. Follow these next instructions and get it done!
A) Add the metadata to your website
You must have claimed the website you want to link to your Pinterest account and you want to apply to your Rich Pins before setting them up.
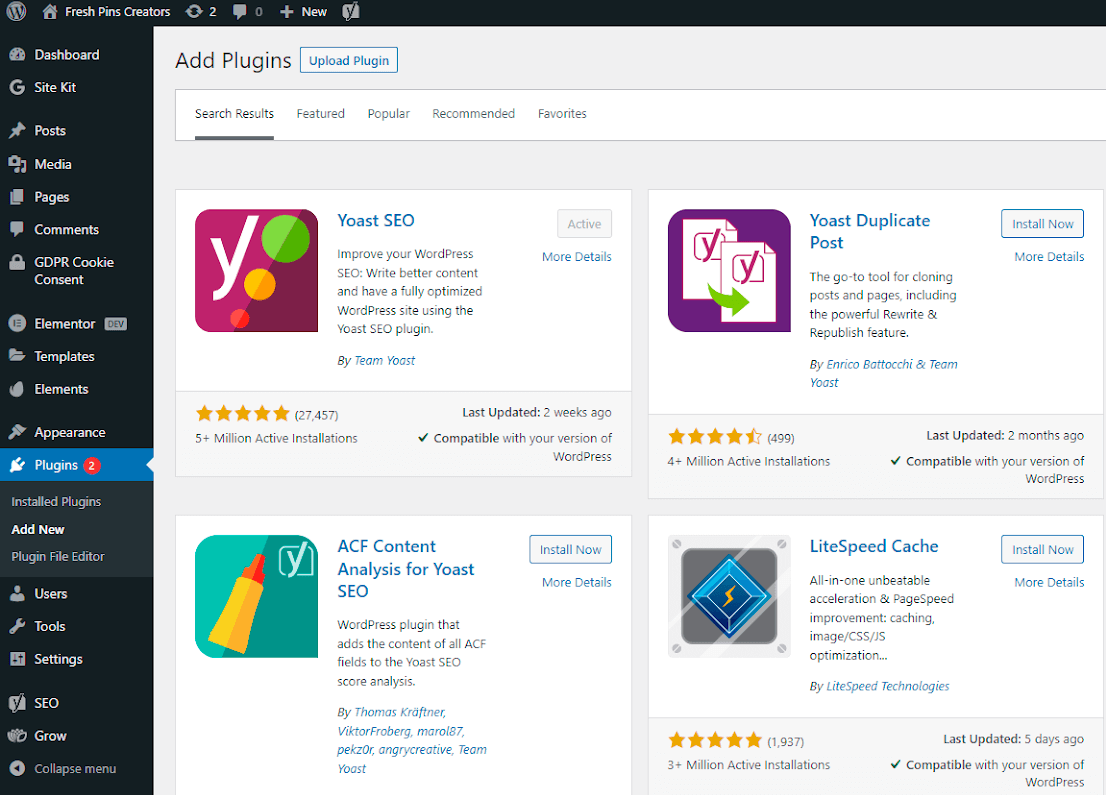
The easiest way to set up Rich Pins for WordPress is to use Yoast, which is completely free. If you don’t have it, head to Your WordPress dashboard and install the Yoast SEO plugin. It’s pretty simple: head on over to the back of your WordPress go to the Plugins section on the menu, add the new plugin, and activate it.
Then, set up Yoast to make sure you’re including all the links to each one of your social media platforms when prompted. Once you’ve configured Yoast, under the SEO section on the menu, you want to hit the SOCIAL tab.
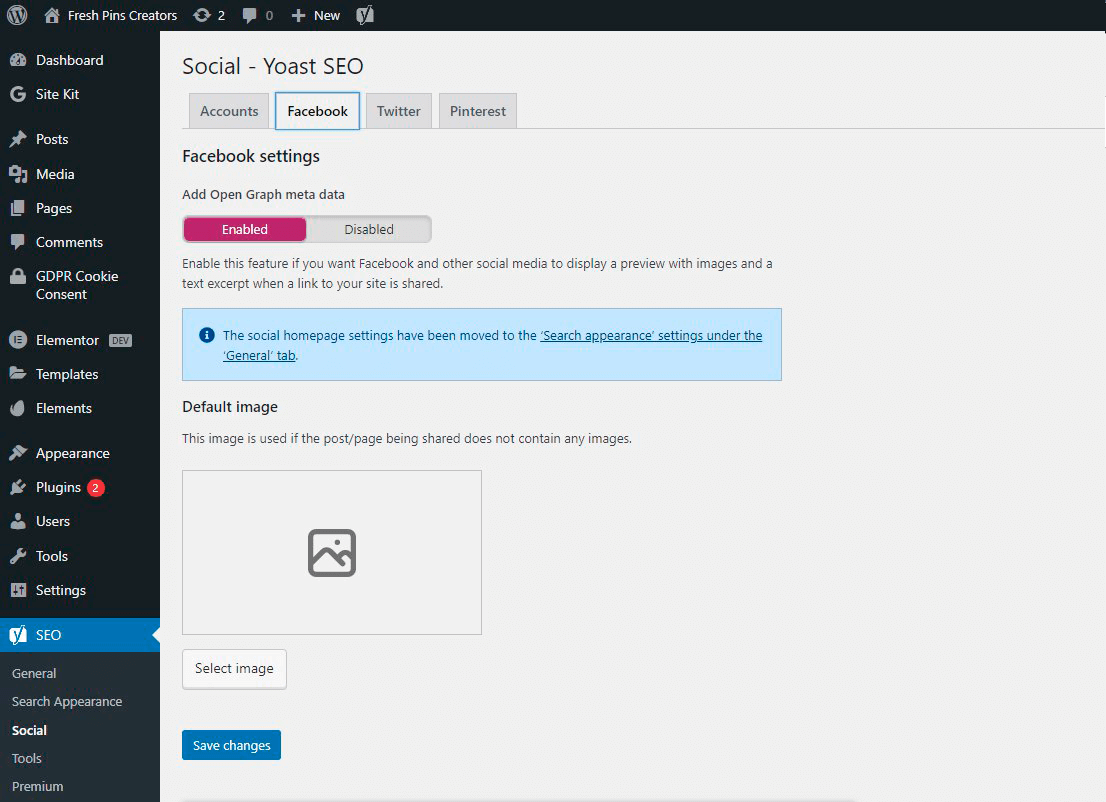
Go on over to the Facebook tab. Now in order to allow this process to work, make sure the graph metadata is set to ENABLED and after all that just save changes and we’re done with this!
So, this setup allows Pinterest to read the metadata when it checks your website to validate it.
B) How to Apply for Rich Pins
Now Pinterest will apply rich pins immediately, but if you want to opt-out for any reason, here you can find the latest tutorial by Pinterest.
C) Edit and create captivating descriptions
If you think you need to edit your Rich Pins show info, keep in mind that it is controlled by the copy you write for your meta description for each post. So go to the editor of your blog posts and scroll down to the Yoast SEO tab. Go to the meta description section; whatever you add is what Pinterest will pull for your Rich Pins descriptions. If you leave the meta description blank, your Rich Pins will only show the first lines of your article so any information or keywords you think are important to your Rich Pins must be added in that box.
Well, this was a lot of helpful information, and now you are a pro on Rich Pins and the impact they have we hope you have decided to include them in your Pinterest Marketing Strategy! Don’t forget we help content creators, businesses and entrepreneurs stand out on Pinterest, so if that’s a goal you are aiming to you should go check out our services and get started!